
Unity Tutorial: Mouse Parallax
Interactive transform layers w/ mouse movement

Intro
Interactive mouse parallax is an effect that's been common since (I'm guessing, based on old memories) around mid-2000s and onward. Adding a layer of dynamic animation makes for a more engaging and 'fun' interface.

The concept is simple enough- layers orbit/rotate or translate/move opposite to the position of the mouse on the screen. Example: If the mouse moves to the right-most corner, our layer should move left.
Core/Algorithm
Just as well, the algorithm is straightforward:
Get mouse position (screen coordinates).
Normalize mouse position [0.0, 1.0]:
normalizedMousePosition = mousePosition / screenResolution;
Center ('signed') normalized mouse position [-1.0, 1.0]:
normalizedMousePosition -= 0.5;normalizedMousePosition *= 2.0;
And that's it! We now have the mouse position as XY between -1.0 and 1.0.
With the signed 'normalized' value, we can use this to translate and orbit our transform (which we can refer to as the 'layer') based on some exposed properties.
Implementation
Here's the full script for MouseParallax.cs.

Copy-paste from below:
using UnityEngine;

public class MouseParallax : MonoBehaviour
{
    [Header("Position Parallax")]
    public float positionParallax = 1.0f;
    public Vector2 positionParallaxScale = Vector2.one;

    [Space]

    public float positionLerpSpeed = 10.0f;

    [Header("Rotation Parallax")]
    [Range(0.0f, 180.0f)] public float rotationParallax = 45.0f;
    public Vector2 rotationParallaxScale = Vector2.one;

    [Space]

    public float rotationLerpSpeed = 10.0f;

    void Start()
    {

    }

    void Update()
    {
        // Remap to [0.0, 1.0].
        // Mouse position across screen.

        Vector2 normalizedMousePosition = new(

            Mathf.Clamp01(Input.mousePosition.x / Screen.width),
            Mathf.Clamp01(Input.mousePosition.y / Screen.height));

        // Remap to [-1.0, 1.0].

        normalizedMousePosition -= Vector2.one * 0.5f;
        normalizedMousePosition *= 2.0f;

        // Position.

        Vector2 targetPosition =

            -normalizedMousePosition *
            (positionParallaxScale * positionParallax);

        transform.localPosition =

            Vector3.Lerp(transform.localPosition,
            targetPosition, positionLerpSpeed * Time.deltaTime);

        // Rotation.

        Quaternion targetRotation = Quaternion.Euler(

            -normalizedMousePosition.y *
            (rotationParallaxScale.y * rotationParallax),

            +normalizedMousePosition.x *
            (rotationParallaxScale.x * rotationParallax),

            0.0f);

        transform.localRotation = Quaternion.Slerp(

            transform.localRotation, targetRotation,
            rotationLerpSpeed * Time.deltaTime);
    }
}
Layers
I have a drawing by @magic_chromatic split into several layers stacked together.
They have the same XY positions, but are offset along the Z-axis.
![2024-06-03 19-04-43.mp4 [optimize output image]](https://substackcdn.com/image/fetch/$s_!azXA!,f_auto,q_auto:good,fl_progressive:steep/https%3A%2F%2Fsubstack-post-media.s3.amazonaws.com%2Fpublic%2Fimages%2Fe136d9fd-8d4e-4bd0-ac8b-263cebaee6d6_600x338.gif "2024-06-03 19-04-43.mp4 [optimize output image]")
These are literally just quads parented to a root game object.

I’ve scaled them to fit the camera’s field of view based on their Z-axis position.
![Parallax Meteor Camera.mp4 [optimize output image]](https://substackcdn.com/image/fetch/$s_!iNDI!,f_auto,q_auto:good,fl_progressive:steep/https%3A%2F%2Fsubstack-post-media.s3.amazonaws.com%2Fpublic%2Fimages%2F8b33ec6c-936e-4fdc-8d3d-49dce0f46748_600x338.gif "Parallax Meteor Camera.mp4 [optimize output image]")
On the parent game object containing all these layers as a child, add MouseParallax.
Feel free to tweak the values.
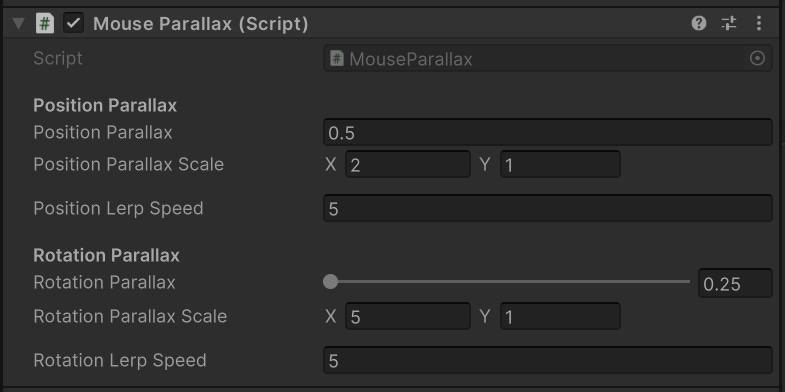
MouseParallax.cs as a component in Unity’s editor.That’s it!
![2024-06-03 18-37-10.mp4 [optimize output image]](https://substackcdn.com/image/fetch/$s_!MFsN!,f_auto,q_auto:good,fl_progressive:steep/https%3A%2F%2Fsubstack-post-media.s3.amazonaws.com%2Fpublic%2Fimages%2F401d676c-a651-4c77-896f-13002a47ad5e_600x338.gif "2024-06-03 18-37-10.mp4 [optimize output image]")
Check out this example video I posted earlier of this effect at work.

Note: *This is an updated version of a previous tutorial.
You can follow me on Twitter/X for more (@TheMirzaBeig)!